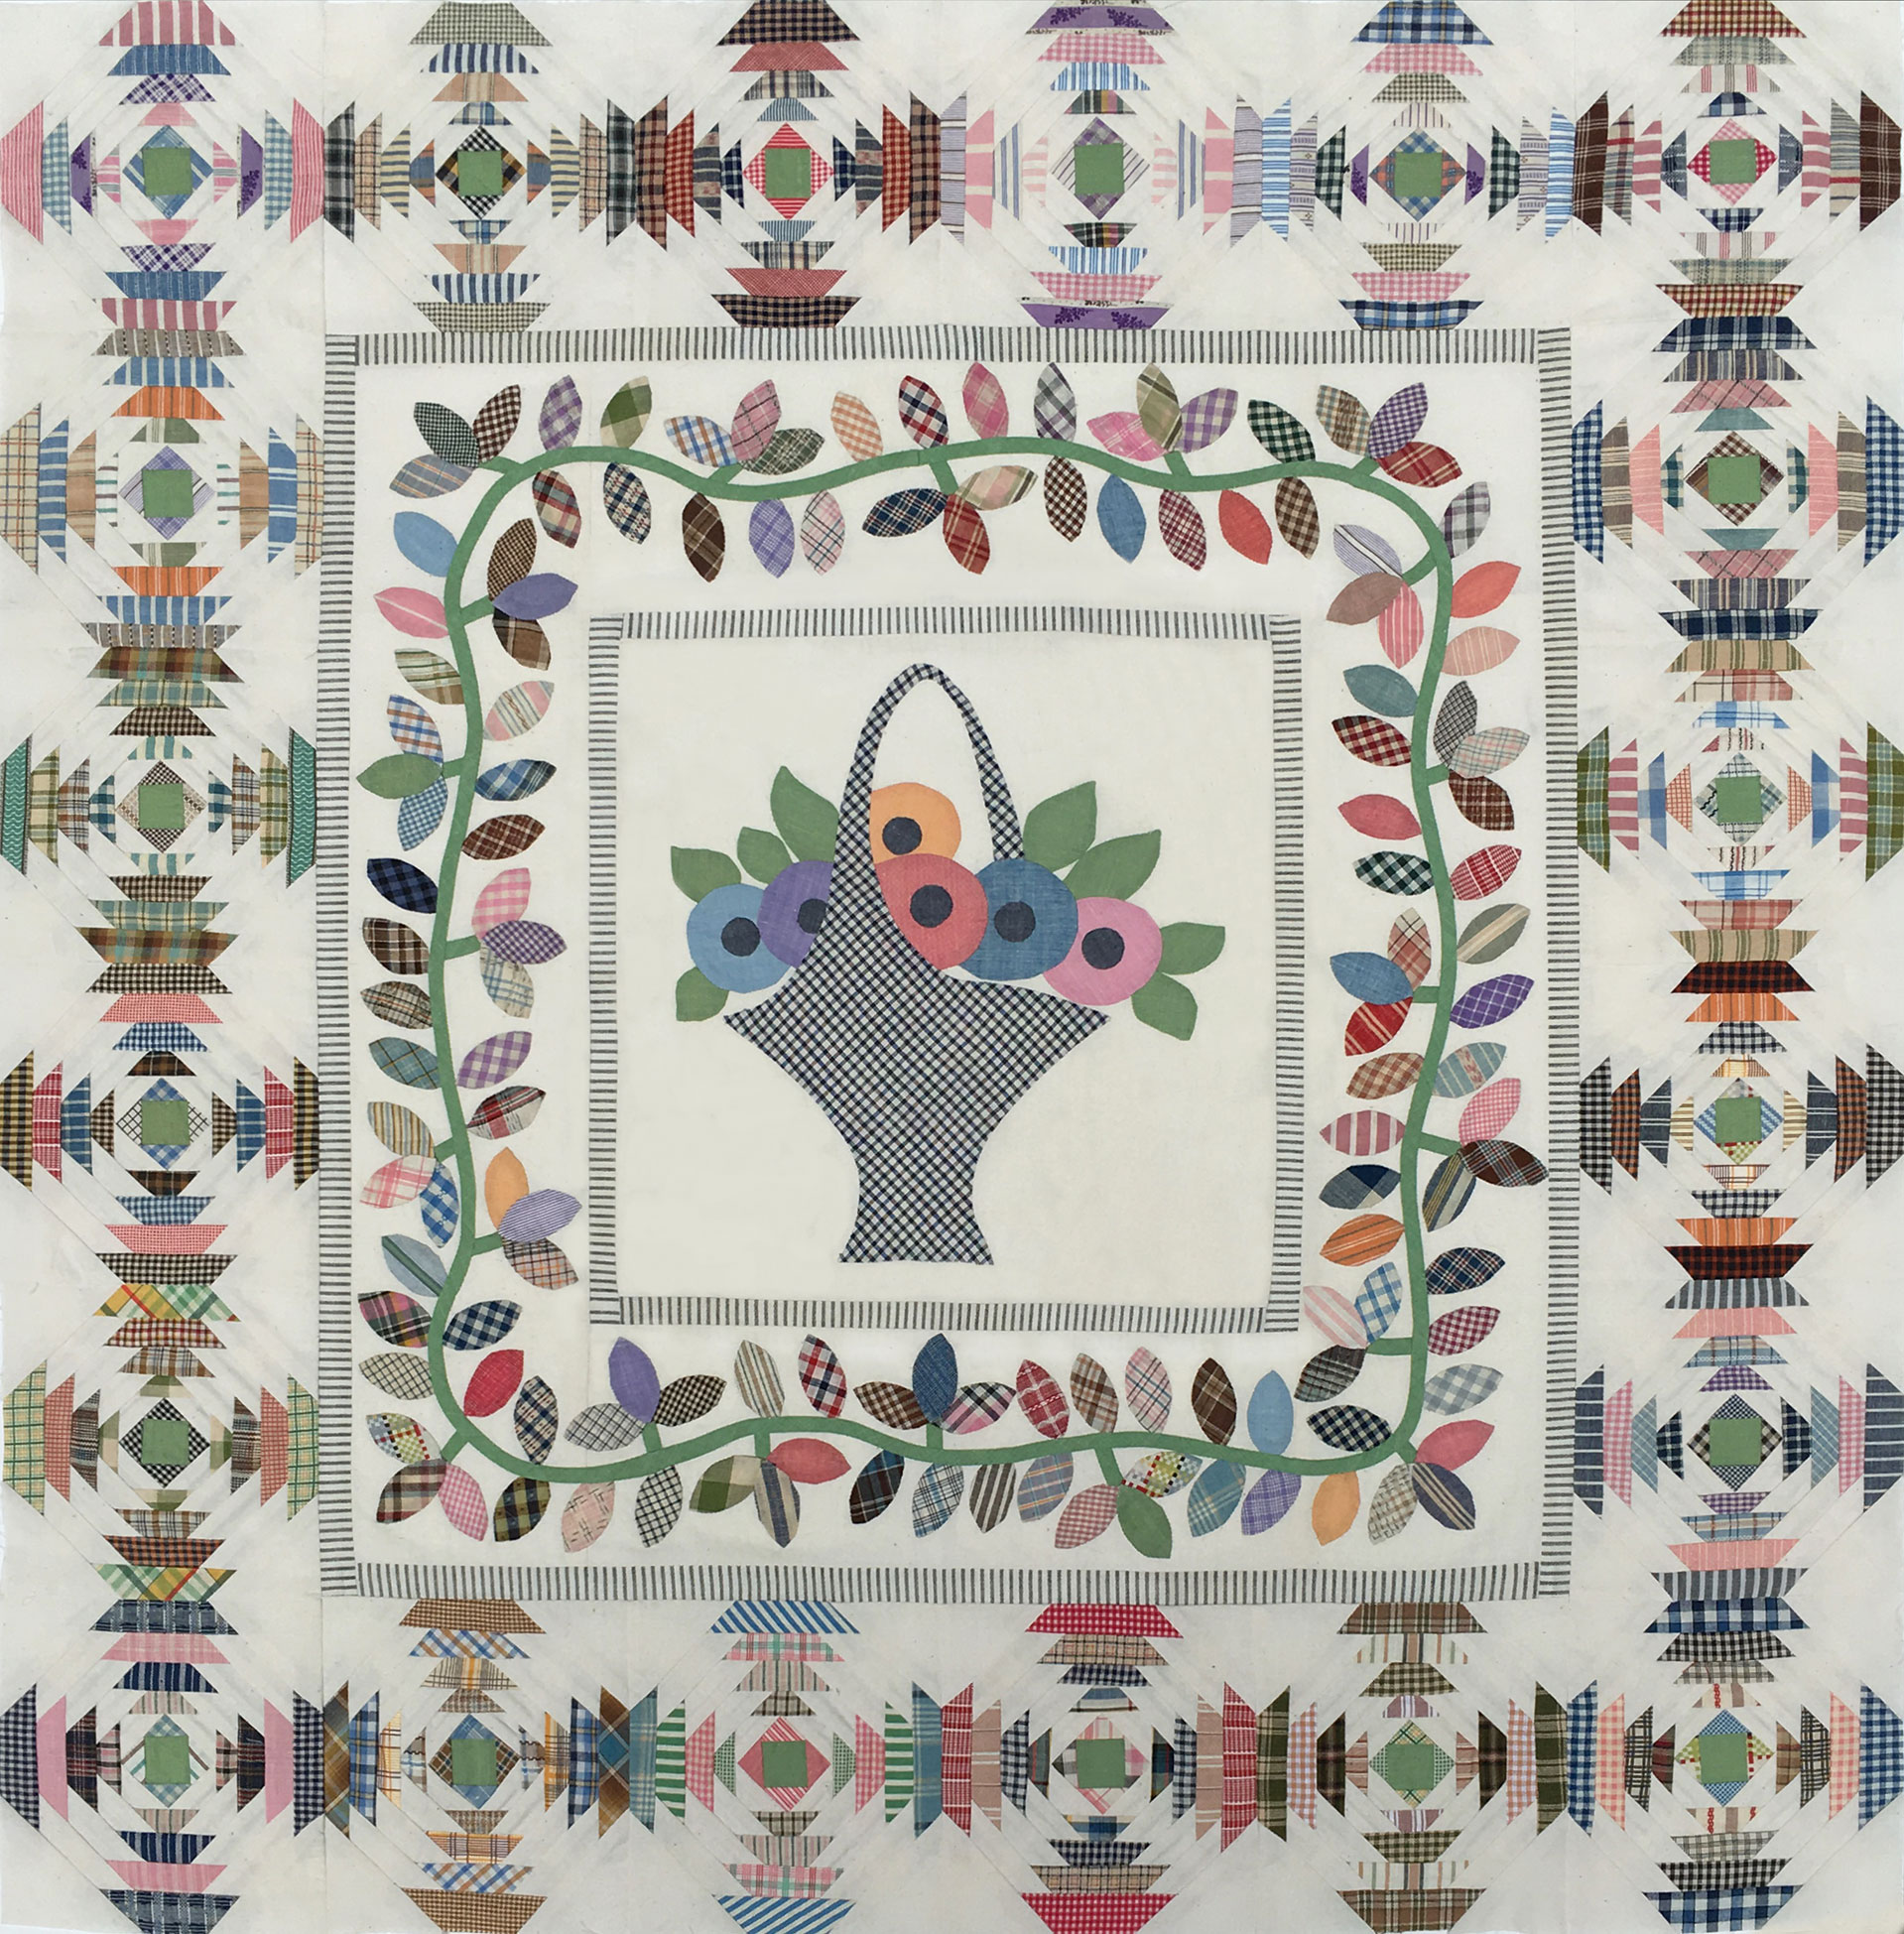
Umbrella Bouquets Applique/Embroidered Quilt Pattern

by Martha in Patterns

This was a series quilt from Stitch ‘n Sew magazine in 1978.  Unfortunately, I only have the Mar/Apr and May/June issues, which means I only have full-sized patterns for the first 5 of 16 blocks.  Fortunately, I was able to scan, clean and enlarge a small drawing of all of the patterns (although the detail is not as nice as the full-sized images).  Also, since blocks 1 – 5 are the only ones with color suggestions, you would have to wing it on the other 11 blocks, unless you happen to have some late 1978 Stitch ‘n Sew magazines in your collection.

There are lots of umbrella with flowers embroidery patterns, but they are usually more frilly.  I like this big, plain umbrella.  Although the pattern instructions call for appliqued umbrellas (using a print) and appliqued flowers (using solids with embroidered details), I think just embroidery, or crayon and embroidery would also be nice. To see the images at their full resolution, click twice on the gallery photos.


Vintage Violet Chintz Aprons

by Martha in Other Needlework

I’m pretty excited about this post, because these are the first two items for my new Etsy shop (opening as soon as I manage to create at least one page of inventory). These aprons are constructed with vintage 36″ wide fabric from the 40s and 50s.  I am pretty proud of myself for figuring out a technique to add the slit pockets, which I think work well when you want pockets, but don’t want to distract too much from the design of the main print.

It has not escaped my attention that there are tons of really cute hand-made aprons available on Etsy.  Most sellers decide on a pattern and produce variations in different prints.  I can understand that this is an efficient way of producing a product, but it just doesn’t appeal to me.  Each one of my aprons will be completely different, inspired by a particular vintage fabric remnant.

The skirts of both of these aprons are made with a glazed chintz border print featuring violets.  The first apron has a green geometric border in a 1950s percale and a large bow in the back.

The second apron has a scalloped hem and is trimmed with vintage French fabric formerly used as a duvet cover.

Thank you so much for your compliments and encouragement in the whole quilt kit making fiasco.  I have not given up on this idea, and hope to have some new (less complicated) kits made up soon.  For those of you who were game enough to try my RPTPP quilt kit, we do have a winner.

The winner is Lori from Humble Quilts.  Lori is a very accomplished doll quilt maker (maybe you have participated in one of her doll quilt-a-longs), so I’m sure she will have no problem with this little quilt kit.  Congratulations, Lori!

Vintage Doll Quilt Kit — Rob Peter to Pay Paul

by Martha in Random Things

Last year I mentioned in a post that I was thinking of selling kits to make doll quilts with vintage fabric, and talked about what the kits would include. Several readers commented that my plans seemed overly elaborate (with pre-cut blocks and a sample block). Let me just say right now that everyone who said that was so right.

I have spent the past two days selecting, pressing and cutting the 42 8-piece blocks for this quilt, a scrappy Rob Peter to Pay Paul variation of the Drunkard’s Path pattern, which finishes about 19″ x 22″.   Although I went through the process just the way I always do, it was pretty surprising to me how much time I actually spent on these tasks.  Some readers suggested, in an effort to increase cost effectiveness, that I only provide the fabric and templates, but that’s tricky when you’re dealing with odd-sized vintage scraps and quilt pieces. Another issue was the challenging pattern with all those curves in the tiny 2 1/2″ blocks and the 1/8″ seams, which would probably only appeal to more advanced sewers or quilters.  Long story short, I decided that this is the one and only kit of this pattern I will ever put together, and I am just hoping there is someone out there who would actually be interested in making it.

There are 42 cut blocks plus two extra (just in case, but not included in the photo — sorry). These fabrics are vintage 1930s/40s tightly woven cottons (no feedsacks) in small prints, and I included some cute novelties. Each block is composed of two prints (a few have one solid fabric) and I have matched up the prints that I thought looked cute and provided enough contrast, although you could certainly make changes. I have included a sample block for reference, and a piece of blue vintage fabric for the borders. I didn’t bother to include any instructions, because I’m never going to do this again, and I figured any quilter who could actually put this together wouldn’t need instructions from me.

If you are interested in making this RPTPP doll quilt, please leave a comment on this post letting me know, even if it’s only to say “I told you so.”  If there is more than one interested party, I will select a winner on Sunday, Jan 15.

The cut pieces below are 1 5/8″ on the longer sides.

A photo of the second doll quilt in this pattern that I made a few years ago.

Charley Harper Water Drop Quilt

by Martha in Quilts

It’s done, and I’m so happy to finally have all my Christmas presents finished.  The inside of the drop is pretty tightly packed, so I decided to quilt little amoebas between the organisms.  For outside the drop, I was going to quilt wavy horizontal lines, but after stitching a few, I changed my mind and decided to echo quilt around the drop.

There are a few things I’d change if I were ever going to make this quilt again (which is highly unlikely), but overall I’m really happy with the way it turned out.  I love the process of turning a fabulous illustration into a quilt.

Charley Harper Water Drop Quilt
Martha Dellasega Gray, 2012
illustration from The Giant Golden Book of Biology, 1961
hand embroidered & appliqued (with a little painting), hand quilted
48″ x 62″

New Year’s Eve

by Martha in Random Things

Even though I’ll probably never host a New Year’s Eve party (several times I’ve actually gone to bed before midnight), I would love to be able to send out this adorable invitation.

I hope everyone has a happy and healthy 2012.

Make It Yourself — Vintage Style Scented Valentine

by Martha in Random Things

For this project I cleaned up and tweaked a vintage valentine image I found on Etsy.  I’ve never seen a valentine quite like this, so I thought it would be fun to try and reproduce it.  The idea of putting a little perfume under the skirt really appealed to me, although Gordon thought it was sort of weird.

STEP 1
Click to enlarge this image.  Right-click to save the image, and then print it approximately 6″ x 6″ on card stock or mat photo paper.

STEP 2
Use a razor blade or X-acto knife to cut along the line below her bouquet where the skirt will go. The cut should start at the edge of her glove and extend about 1/2″ beyond her elbow. Cut a rectangular piece of white felt (about 1/2″ x 3/4″) and glue it in the white space below your cut.  The original card has a piece of white cotton fabric, but the wool felt seemed like a better choice.

STEP 3
Cut a 4″ x 1 3/4″ piece of fabric (I chose a vintage fabric scrap). Turn under and press the raw edges on both ends and the bottom. Stitch the bottom hem (the sides do not need to be stitched), and gather the top edge.  Note:  Barbara mentions in her comment that she has a card like this which used a handkerchief as the skirt.  The original of this card also appears to use a piece of a floral handkerchief.

STEP 4
Slide the gathered skirt into the slit and play with the gathers until you think it looks right. Turn over the card and place a piece of tape over the gathers on the back to flatten them (I used a piece of athletic tape, but you could use anything). On the front place a small dab of glue on the corners of the skirt and press them in place to keep the skirt from shifting.

STEP 5
Now you’re going to cut out the card. Place your card on top of another sheet of whatever paper you are using, and staple them together around the edges.

STEP 6
Cut out the cards together, using a gentle scallop around the edges. Be sure to leave an uncut area on four of the scallops, which is where the two sides will be connected.

STEP 7
Trim the two tabs as shown in the photo below. The front tab is twice the size of the back tab which allows it to fold over the back.

STEP 8
Bend the front tab so that only the red portion shows from the front. Place the front tab over the back tab (making sure the two sides of the card are lined up correctly) and glue the front tab to the back tab.

STEP 9
Trace a heart shape from the front of your card (the yellow heart) and cut two identical heart shapes from colored paper. Glue these to the insides of the card.

STEP 10
Place a drop of perfume on the felt, write a sweet sentiment on the inside, and you’re done!

Countdown to Christmas – Merry Christmas!

by Martha in Children's Books

Magic Paint Book
Paint With Water
Whitman Publishing Co., 1949

Countdown to Christmas – 1 Day

by Martha in Children's Books

Magic Paint Book
Paint With Water
Whitman Publishing Co., 1949

Countdown to Christmas – 2 Days

by Martha in Children's Books

Magic Paint Book
Paint With Water
Whitman Publishing Co., 1949

Countdown to Christmas – 3 Days

by Martha in Children's Books

Magic Paint Book
Paint With Water
Whitman Publishing Co., 1949

Countdown to Christmas – 4 Days

by Martha in Children's Books

Magic Paint Book
Paint With Water
Whitman Publishing Co., 1949

Countdown to Christmas – 5 Days

by Martha in Children's Books

Magic Paint Book
Paint With Water
Whitman Publishing Co., 1949

Countdown to Christmas – 6 Days

by Martha in Children's Books

Magic Paint Book
Paint With Water
Whitman Publishing Co., 1949

Countdown to Christmas – 7 Days

by Martha in Children's Books

Magic Paint Book
Paint With Water
Whitman Publishing Co., 1949

Countdown to Christmas – 8 Days

by Martha in Children's Books

Magic Paint Book
Paint With Water
Whitman Publishing Co., 1949