For this post, I thought I would show you a little more of my process for designing/piecing my quilts. No Electric Quilt software for me — I work with computers at my paying job, and I’m not interested in combining computers and quilting.
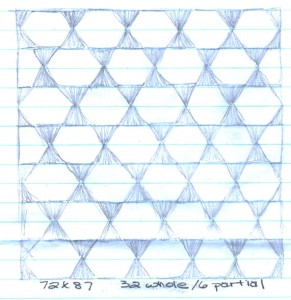
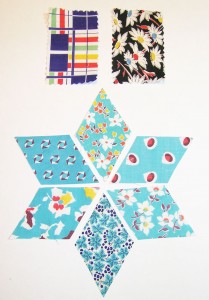
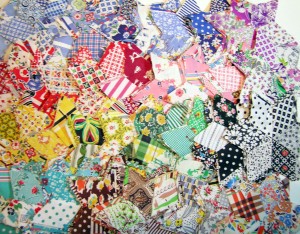
This project began with a box of vintage salesmen sample swatches — probably from the 1940s or maybe the 1950s. There were hundreds of prints (some with duplicates and different colorways). All of the pieces were the same size (1 3/4″ x 3″) with a pinked edge. I drew a pattern of how I wanted to set the blocks and computed that I would need 1,488 printed diamonds (the dark setting triangles will be a solid — probably green). I drafted my template diamond to fit the quilt pieces and began starching, drawing & cutting (they were very clean and did not need to be soaked). Once the pieces were all cut, I began sorting them by color and matching up the six diamonds for each star. I pinned each star’s diamonds together and put the 42 pieces for each block (represented by the white hexagon) in it’s own little envelope.
I hand pieced all the stars with a running stitch (I don’t like to paper piece) and pinned each block group together.
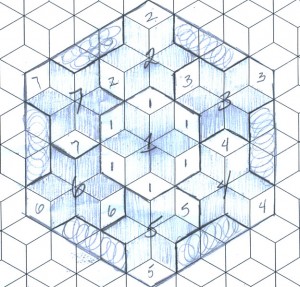
Next I had to figure out the order for sewing the white diamonds to the stars and joining everything together. This is the trickiest part and I’m sure each quilter probably does it a little differently. For me, it works best to draw it out on a grid. I decided to combine the 2 white diamonds and the triangle on the outside of the block into one long piece. First I stitched the white diamonds to their corresponding numbered star — then the stars are sewn together sequentially. The long white pieces are added last.
Here is a finished block.


Wow, this is really amazing. I’m starting to wonder if working on a project like this might actually teach me some patience. Or would it drive me nuts because I don’t have any patience? 🙂
What a wonderful project! It’s a treat to see how you work. 🙂 It warms my heart to see these older patterns worked and not left behind. Just cutting the pieces is a project? 😉 I’ll bet the newer quilters would be surprised that this is how us older quilters did all of our quilts?
30 some years ago I made a 7 sister’s quilt from scraps, for my youngest daughter and put it away until she married, and like Ann said, I did it the old way. Took me a year of spare moments. But it was a joy to make and all the different scraps set against white was a beautiful sight. Just like yours is going to be.
I just love looking at all those beautiful fabrics! This is going to be a gorgeous quilt! Thanks for sharing the process!
I have always loved Seven Sisters quilts and yours look like it is going to be gorgeous!!
I really enjoyed hearing how you approach the process! Just a question – when marking the diamonds to cut out do you also mark the seam allowance/sewing line? Or do you just eyeball it as you are sewing?
Thanks again,
BJ
Thanks for a glimpse into your creative process. It was very insightful to know how much work and effort goes into making those beautiful quilts. I don’t think I have so much patience 🙂
Once again I find myself amazed at how resourceful you are with even the smallest pieces of vintage fabrics. I am always looking for ways to use up those tiny pieces. Inspiring!
Thanks for this! I love learning about how other design and create their quilts. I have the feeling that this is going to be another lovely one from Martha.
One day you will have to share some of the secrets about how you score all of these vintage treasures. Thanks for sharing them.
Hi Martha!
It is so NEAT to see how you work! You tackle such complex patterns with great success. I’m sure your orderly approach and careful planning are key.
This is going to be a BEAUTIFUL quilt! Your completed block is fantastic and I can see some very nice stars waiting in the wings.
I was surprised when I realized from looking at your grid that these are the same pieces which would be used for a tumbling blocks quilt – it is so cool that changing the layout of colors can produce two very different quilts.
I always love seeing how different people work their way through a project…. this was an especially fascinating post for me! Thanks for sharing your process.
Bonjour, je souhaiterais avoir le tracé un bloc cubes en centmètres s’il vous plait. Je vous remercie d’avance